Hosting a website with a VPS on 1984.is
Creating and hosting a website with a VPS from 1984.is on a Debian bullseye 11
Although this can work with other VPS providers, it requires some modification, but as of today this process can work as is.
Prerequisite:
- Having setup Debian bullseye 11 with 1984.is
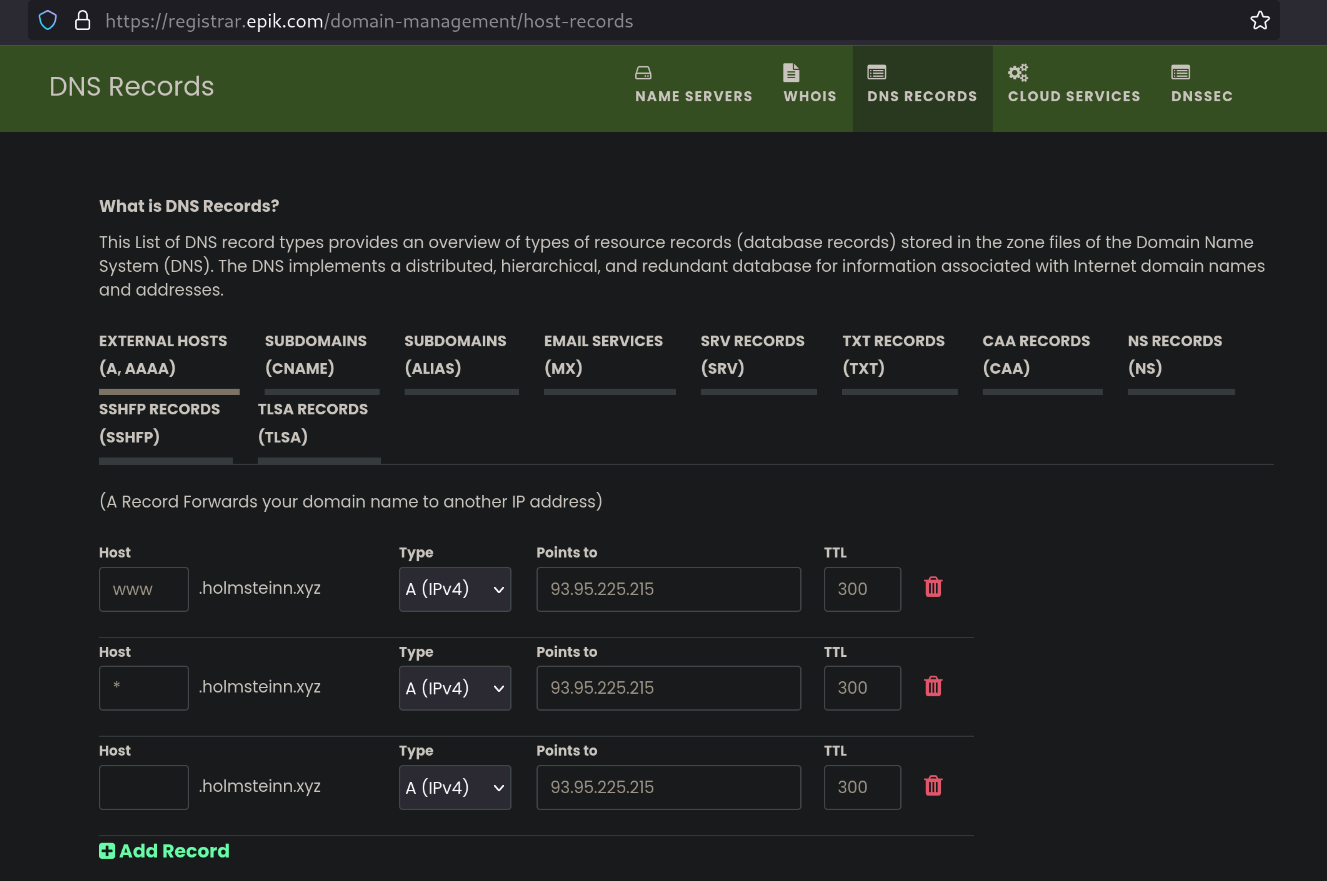
- Having purchased a domain and set its DNS host records to your VPS

Start with updating and upgrading
# As of 2024-21-12 the "Allow-release.. and fix-missing" is needed
apt-get update --allow-releaseinfo-change && apt-get upgrade --fix-missing
We will be using SSH to work on our local machine
From the local machine, generate a gpg key to more securely ssh into the VPS server, then send the id to the server.
gpg --full-gen-key
ssh-copy-id <server_name>@<server_ip>
Then login into the server from your local machine;
Start with securing the login process through SSL and GPG:
ssh <server_name>@<server_ip>
# Edit the sshd service config to secure the server login process
nano /etc/ssh/sshd_config
In the sshd service config, find the following lines and edit them like so:
PasswordAuthentication no
UsePAM no
ChallengeResponseAuthentication no
Now test if the GPG SSH configuration worked:
systemctl restart sshd
exit
ssh <server_name>@<server_ip>
Did authentication with GPG through SSH work or not?
Now test out if this worked by exiting the VPS server in your terminal and try to ssh into it again. If it doesn’t prompt you for a password, congratulations! :)
If it doesn’t let you in then something went wrong with the ssh process. Simply login to 1984.is, open their terminal and edit the service_config file back to “yes”’s so you can continue logging in with your chosen password
Now for updating, upgrading and installing packages:
apt-get update --allow-releaseinfo-change
apt-get upgrade
apt install curl nginx certbot python3-certbot-nginx
Setting up nginx
cp /etc/nginx/sites-available/default /etc/nginx/sites-available/mysite
nano /etc/nginx/sites-available/mysite
Edit the config of your site
| From this | To this |
|---|---|
| listen 80 default_server; | listen 80; |
| listen [::]:80 default_server; | listen [::]:80 ; |
| root /var/www/html; | root /var/www/mysite; |
| server_name _; | server_name websiteName.xyz www.websiteName.xyz |
Save and exit.
Make a symbolic link to the new nginx file:
ln -s /etc/nginx/sites-available/mysite /etc/nginx/sites-enabled/
Make a directory to store the Hugo website:
mkdir /var/www/mysite
cd /var/www/mysite
Make a dummy HTML to test out if you can see your website:
touch index.html && nano index.html

<!DOCTYPE html>
<html>
<body>

<h1>My First Heading</h1>
<p>My first paragraph.</p>

</body>
</html>
Save and exit
systemctl reload nginx
Lastly let’s obtain and install the SSL certificate
certbot --nginx
# Enter your email, agree to the terms, answer if you want emails,
# select the domains you want to register
If you get an error, you may need to go into the nginx config again to remove ipv6only:
# Get the pid of open vpn then kill it
pidof openvpn
kill <pid>

# Check if it worked by reloading nginx and trying to open your website
# in a private window
systemctl reload nginx.service
Another error you might encounter is that OpenVPN is using the same port as Cerbot:
nano /etc/nginx/sites-available/mysite
# Remove 'ipv6only=on'
| From this | To this |
|---|---|
| listen [::]:443 ssl ipv6only=on; # managed by Certbot | listen [::]:443 ssl ; # managed by Certbot |
systemctl reload nginx
That’s it, now you should have an HTML website that you can start working on.
Thanks to Luke Smith for inspiring me with the guide he made: Link to invidious video